
As I've learned over the past few weeks, The Outlast Trials has A LOT going on, and it's very easy to get overwhelmed when you're still new. So let me share a few things I wish I'd known from the start, before you make the same mistakes and end up on the wrong side of Captain Cattleprod.
1) Solo or Multiplayer?
And the first thing you need to know is that The Outlast Trials works both as a solo, slow-burn horror game and as a co-op party game. And it's actually good at both!
If you're playing solo, the game is an intense, stealth-focused horror similar to the original Outlast. So if you're looking to skip a couple of heartbeats, you can absolutely play through the entire game solo without missing out on anything.
In fact, as a beginner I would highly recommend clearing every major trial solo. It'll give you a chance to learn the maps, figure out the objectives, and get a feel for the enemies before throwing yourself into the whirlwind of chaos that is the multiplayer.
Video version of this guide (~16 minutes)
Speaking of which, co-op in The Outlast Trials is a very different beast. It's less a traditional horror game, and more of a dark comedy - something between R.E.P.O. and Lethal Company. Everything gets faster, messier... and honestly, a lot more stupid - but in the best way possible. Because let me tell you, it's hard not to laugh like a gremlin when you see two grown men dressed as BDSM clowns dancing around a tea table while trying to avoid a dwarf with a shotgun.
So neither option is inherently better. Solo gives you the tension and atmosphere, while co-op is all about the chaos and goofs. So try both and see what tickles your fancy. You can't go wrong!
2) Where to Go?
Now let's talk about the maps. They're huge, they're maze-like, and the game isn't going to constantly hold your hand and give you a nice, big, glowing marker to lead you through them. So if you try to run through them blindly, you can easily waste more than an hour on what should've been a 10-15 minute mission. And unfortunately, I know that from experience!
But don't worry. The game isn't cruel. The game almost always gives you clues through the environment itself! You just have to actually look for them. Sometimes it's a literal signpost showing you the layout of the building. Sometimes it's a TV screen telling you where the keys are hidden. And sometimes it's just a sign above the door telling you where you are.
So whenever you start a new map, or are given a brand new objective, take a moment to look around. You'll usually find some sort of guide nearby that will point you in the right direction. And if you ever forget where you're supposed to go, don't start blindly bumbling through the levels - just go back and have another look. Trust me, a short trip back will save you a lot more time than just blindly rummaging through yet another, seemingly identical office.
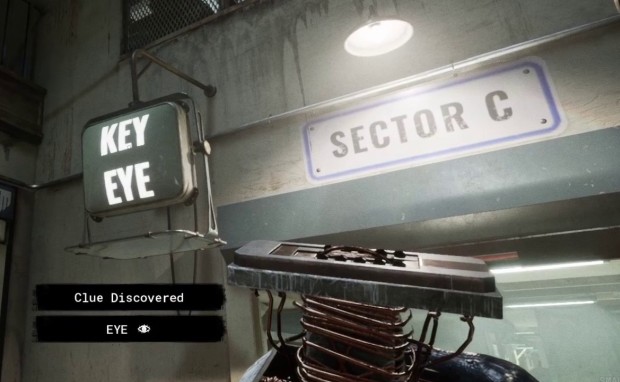
Sometimes it's very obvious
3) How to Run Away?
No matter how careful you are, sooner or later you're going to end up on the wrong side of a cave troll. So how do you make sure you don't become a snack?
The simplest answer is to just run and hide. The enemies aren't omnipotent, so as long as you can break their line of sight and hide in some dumpster they'll lose track of you. But even if you're too thicc to fit into a dumpster, you can just crouch in a shadowy corner. As long as they're not bumping into you, they won't be able to see you in the darkness. In fact, you can usually just walk around them even if you're close enough to get a whiff of their body odor!
But if you're completely cornered and escape is basically impossible, this is where brick-fu comes to the rescue. Simply chuck one of your throwables directly at the enemy's face, and then use that brief stun to GTFO. It won't hold them back for long, especially not the big boys, but it's enough for you to skeedadle outta there.
And finally, let's talk about the doomsday scenario where you have nothing and there's an angry psychopath blocking your way. In that case, you have to abuse the fact that you're much nimbler than your opponents. Force them to run around objects, vault over obstacles, and go up and down different levels. All of this will give the enemies a bit of pause, so even if they're literally next to you, you'll still be able to get off scott free.
Obviously, none of this makes you invincible, and it'll take a bit of practice to truly master it. So don't feel bad if you end up eating dirt in your first few runs. Just stick with it, and you'll be able to style on the maniacs soon enough!
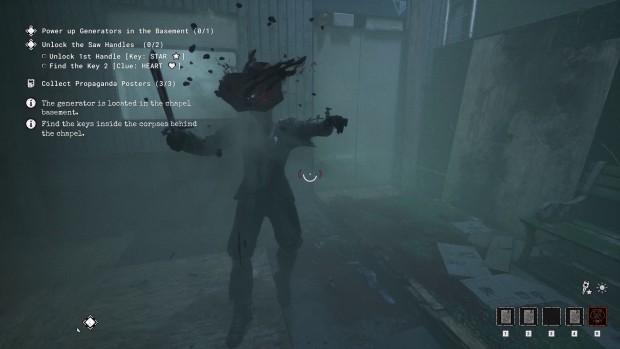
When in doubt, brick!
4) Avoiding Traps
While you're doing all this dipping and diving, you'll have to watch out for a bunch of different traps. Which, when I first started, looked really, really nasty. And I mean, if you fall face-first into them, they absolutely are. But thankfully, they're a lot easier to avoid than you might think.
Take for example mines. They look scary as hell, especially with their big loud beeps. But the game is actually incredibly fair with their hitboxes, so you won't make them go kaboom just by walking nearby. You literally have to step on them! So don't bother doing complex acrobatics to get around them. Just scooch on by... or jump.
In fact, jumping will solve most of your trap-based problems, especially if you're currently being chased. I know it looks like the traps are suuuuper wide, especially the broken glass ones, but your character jumps with the grace of a gazelle, so you can easily clear them. And the sooner you get comfortable doing this, the more comfortable the trials as a whole will become.
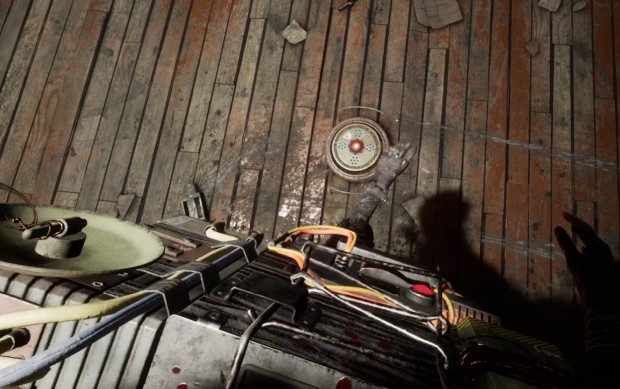
You can get REALLY close
5) Need-to-Know Tricks
The Outlast Trials has a couple of very useful tricks that it doesn't really tell you about. Tricks that will make your life a lot easier... and your heart a lot less stabbed-through.
First up, doors marked with a red light are trapped and will seriously mess you up if you just blunder into them. Thankfully, dealing with them is easy peasy. Just open them while crouched, and the trap will fizzle out harmlessly. This isn't as simple to do while you're fleeing for your life, however, so if you're forced to run, try to go towards areas you've already cleared.
As I learned the hard way, a surprising chunk of containers are trapped, including some of the locked ones. After a brief pause, they'll spew a lingering poison that will wreck your sanity. And unless you enjoy being chased around by Mr. Tentacles, you'll want to avoid that. So whenever you open a box, do a quick check for a suspicious little ampule. If you see one, back the hell away! Same goes for containers you can't see into because you're opening them from below. When in doubt, play it safe and your brain will remain unscrambled!
And finally, we have the most useful movement tech in the game - the crouch jump. It's completely silent and much quicker than just sneaking normally. So if you're ever in a situation where you need to be both quiet and quick, just jump while crouched and roleplay a little bunny. It'll burn through your stamina, but that's a lot better than Coyle burning through your butt.
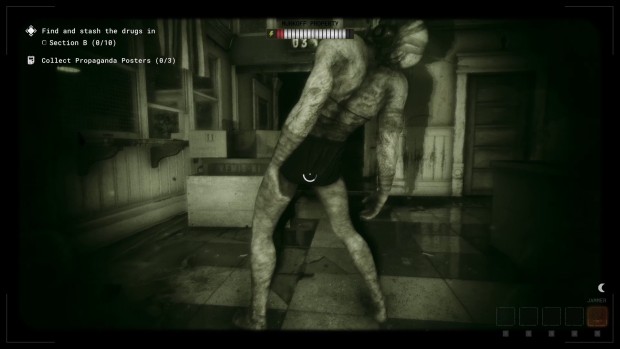
You can even jump next to screamers without making them twitch
6) Explore and Loot
While you can beat missions without using a single item, they're an incredibly useful safety net. And the higher the difficulty, the less of them you'll find lying around.
As such, I would highly recommend going off the beaten path and stocking up whenever you're running low on supplies. You should always try to have a bottle or brick on hand, for example, as that'll save you a lot of hurt in the long run. Meanwhile, Rig Rechargers or Adrenaline will let you breeze through some really nasty sections.
And make sure to keep an eye out for any doors marked as 'Confidential'. They're essentially this game's secret rooms. Once you open them - usually by pressing some nearby buttons - you'll get a ton of goodies. These can include items that raise your stats for the rest of the mission, a master key that can open any lock with ease, or just a huge pile of regular supplies.
So unless you're doing some kind of a speedrun, take a moment to check your surroundings. You might be surprised by how much cool stuff you find.
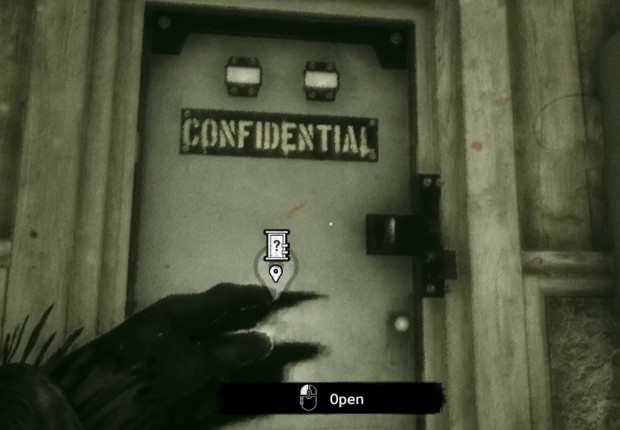
These are always a treasure trove
7) Speed Matters
But as always, there is a balance. While you should explore, you shouldn't waste time once a mission is underway. Why? Because the longer you take, the more chances the enemies will have to mess you up, and the less resources you'll have to work with.
So does this mean you should run everywhere? No. There's no need to take this to the extreme, but do try to keep a brisk pace. Especially in dangerous areas that are being patrolled by multiple enemies - aka, around pretty much any objective.
So if you get the chance to knock out an objective, do it sooner rather than later. You can always backtrack a bit to collect anything you might've missed. That way, if you ever get run out of town by a crazy lady with a drill-droll, at least you won't have to figure out how to sneak past her to actually get the job done!
8) Don't Hoard
The Outlast Trials is one of the rare few games where literally every single item is useful. It doesn't matter if you're on the Introductory or the hardest Psychosurgery difficulty, a humble Brick or a shot of Adrenaline will always be a life-saver.
So don't be like some of the teammates I've met and actually use the damn things! It doesn't matter if you don't squeeze every ounce of value out of each item. Using them whenever an opportunity presents itself is infinitely better than just leaving them lying around until the end of the mission.
But again, there's a balance. If you know a nasty section is coming up, it's perfectly fine to hoard items like Rig Recharges or Adrenaline for when you really need them. That's not wasteful. That's just smart, and The Outlast Trials heavily rewards you for being clever.
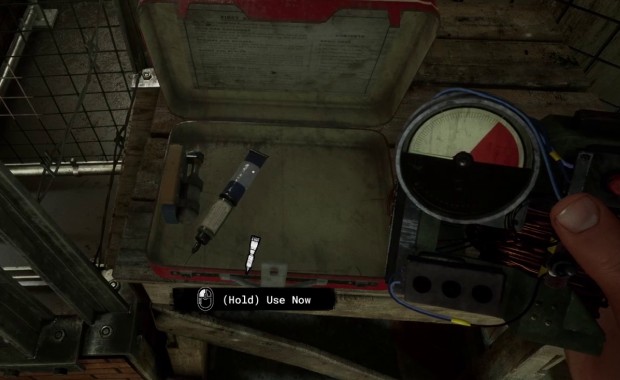
The items are there to be used... so use them!
9) Which Difficulty?
And since we're talking about rewards, you might be wondering - which difficulty should you play on?
Regardless of how experienced you are with horror games, I would recommend starting with Introductory. It might sound like baby mode, but it's actually very similar in challenge level to Standard. The big difference is that the enemies are slightly less aggressive and you get a lot more items to play around with, which is really handy while you're still learning the basics of brick-fu.
Once you've got the hang of things, move up to Standard. It strikes a pretty good balance between being challenging enough that you have to try, but not so ball-crushingly hard that you need to tryhard. So if you're going into a brand new map for the very first time, I would stick with Standard.
The jump from Standard to Intensive, however, is massive. Enemies are more numerous and aggressive, you get less items, and mistakes become a lot harder to recover from. So if you want to make that leap, or even go up to Psychosurgery, try to do it on a map you're familiar with. That way you'll have at least one less thing to worry about.
Just bear in mind that you don't actually NEED to push higher and higher difficulties. Sure, you do get more rewards for it, but clearing Standard with a high grade is plenty rewarding as is.
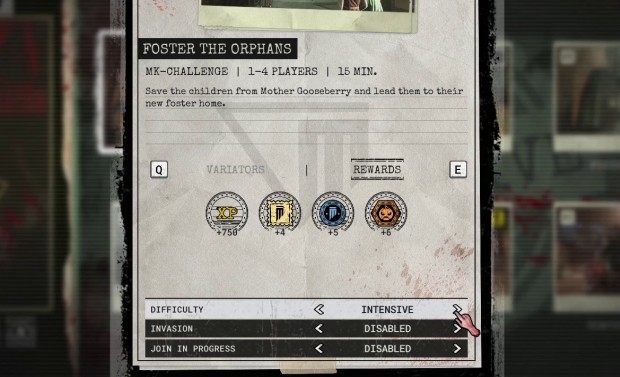
Intensive is the sweet spot if you want a challenge. Psychosurgery is a bit... much at times
10) Getting Good Grades
So what are these grades anyway? Well, at the end of each trial you'll get an experience bonus depending on how well you've performed. And this is calculated individually, so even if your team was spending the entire match having their heads shoved into a toilet, you can still walk out with an A+.
And the whole system is thankfully very, very player-friendly. You get brownie points for doing literally anything good: using batteries, throwing stuff at enemies, unlocking doors, using your rig, completing side-objectives. It's all good. And more importantly, you're never punished for being wasteful or taking a long time, so you can play the game your own way and still earn top marks.
The things that hurt your score are pretty straightforward: getting hit, dying, triggering traps, or just going pants-on-head insane. Basically, stuff you'd want to avoid anyway. But even if you do mess up, it's entirely possible to offset those mistakes by doing enough good things. So you're always rewarded for not giving up and trying your best - even when things go horribly, horribly wrong.
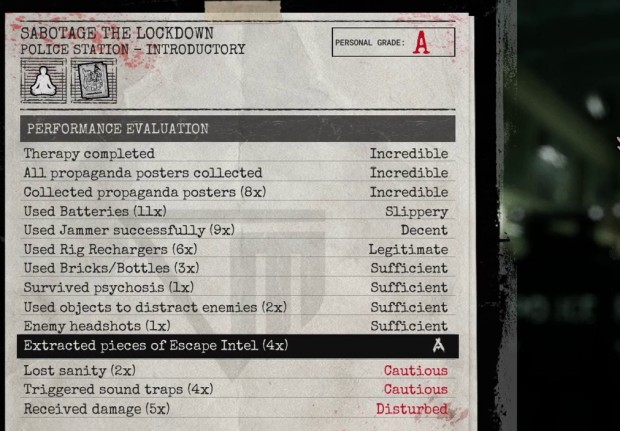
You can really mess up and still end up with a good grade
11) Don't Miss These Options
And finally, there's a couple of really important options you should know about. Options that will make your life a lot easier, especially as a beginner.
In the general settings, you'll want to turn on both Noise Indicator and Darkness Indicator. These will give you small, unobtrusive markers showing you when someone might have heard you or when you're fully visible. Trust me, they help a lot.
In the same menu, I would also recommend turning on permanent Main and Secondary Objectives while you're still learning, and making Player Names fully visible even when they're out of direct line of sight. That last one makes multiplayer soooooooooooooooo much more comfortable, especially when you're new and need someone to show you the ropes.
Next up, don't forget to check your tasks after every run or two. These are essentially your achievements and daily quests, and they're extremely important in the early game because they give you experience which directly translates to much-needed Vouchers for permanent upgrades. Once you've unlocked everything you can start checking them less and less often, but until then, be diligent and you'll be rewarded!
And for the same reason, make sure to check the in-game store daily to open the Daily Murkoff Box. It contains a couple of goodies to help with progression, as well as a random cosmetic. And hey, it's free, so why not!
Do all of this, and you'll be more or less kitted out in 6-7 missions. After that you can do whatever you want, however you want. You're free! Well, you're still imprisoned in an evil test facility. But even so, free!
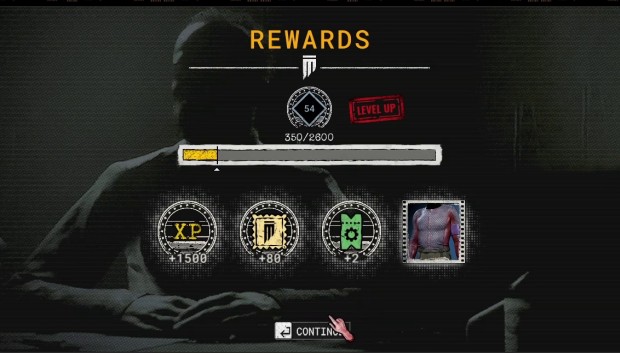
The game can be very rewarding, especially early on
A Few Last Words
And there you have it. Hopefully this guide will make your first trip through the trials a lot less painful.
If you have any questions, drop them in the video's comments and I'll do my best to help. And if you've got some tips of your own, please do share with the class. Have a nice one!
[Note]: I've also made a Detailed Review discussing what The Outlast Trials is all about, what it does well, and where it falls flat. So if you're still on the fence, or just curious about what the game is like these days, I welcome you to check it out.